In the previous article, we wrote an index view to show a list of posts that are created less than two days ago and a detail view to show the detailed content of a post. In this article, we’re going to write a view that allows the user to upload a post and improve our existing index and detail with Django’s built-in generic views.
The Upload View
Similar to what we have done in the previous article, in order to write the upload view we need to write an URL pattern in myblog/urls.py first:
from django.conf.urls import patterns, include, url

# Uncomment the next two lines to enable the admin:
from django.contrib import admin
admin.autodiscover()

urlpatterns = patterns('',
    url(r'^$', 'myblog.views.index', name='index'),
    url(r'^post/(?P<post_id>\d+)/detail.html$',
        'myblog.views.post_detail', name='post_detail'),
    # Link the view myblog.views.post_upload to URL post/upload.html
    url(r'^post/upload.html$', 'myblog.views.post_upload', name='post_upload'),

    # Uncomment the admin/doc line below to enable admin documentation:
    url(r'^admin/doc/', include('django.contrib.admindocs.urls')),

    # Uncomment the next line to enable the admin:
    url(r'^admin/', include(admin.site.urls)),
)
- Writing Tests for Your Django Application’s Views
- How to Use Python Django Forms
- Package Your Python Django Application into a Reusable Component
The previous URL pattern specifies that myblog.views.post_upload should process any request towards the URL post/upload.html. Now let’s write the actual view:
# Add the following import statements to the top of myblog/views.py
from datetime import datetime
from django.core.urlresolvers import reverse
from django.http import HttpResponseRedirect

# Add the following function to the end of myblog/views.py
def post_upload(request):
    if request.method == 'GET':
        return render(request, 'post/upload.html', {})
    elif request.method == 'POST':
        post = m.Post.objects.create(content=request.POST['content'],
                                     created_at=datetime.utcnow())
        # No need to call post.save() at this point -- it's already saved.
        return HttpResponseRedirect(reverse('post_detail', kwargs={'post_id': post.id}))
post_upload handles two possible cases. If the request is a GET request, post_upload simply returns a HTML page. If it’s a POST request, post_upload() creates a new Post object in the database and returns a HTML page with the new Post object in the context.
Next, we’re going to write the template myblog/templates/post/upload.html for our view. This template is going to present an HTML form to the user.
<form action="{% url 'post_upload' %}" method="post">
  {% csrf_token %}
  <label for="content"></label>
  <input type="text" name="content" id="content" />
  <input type="submit" />
</form>
The previous template file uses Django’s template language to specify the content of a page. Whenever the template is rendered along with a context by Django, the code between {% and %} is processed by the template renderer and anything outside of the {% %} tags gets returned as normal string. In order to see the actual output of the rendered template, you can inspect its source code in a browser:
<form action="/post/upload.html" method="post" _lpchecked="1">
 <input type="hidden" name="csrfmiddlewaretoken" value="AGGNpA4NcmbuPachX2zrksQXg4PQ7NW0">
 <label for="content"></label>
 <input type="text" name="content" id="content">
 <input type="submit">
</form>
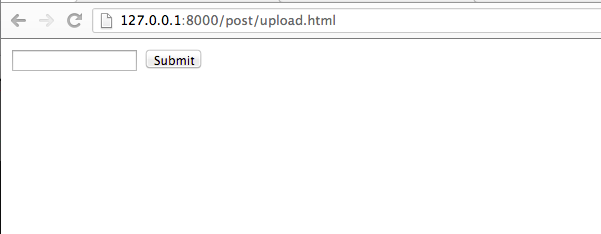
Now you can start the server with the python manage.py runserver shell command, and access the URL http://127.0.0.1:8000/post/upload.html:

Now you can type the content of the new Post object:

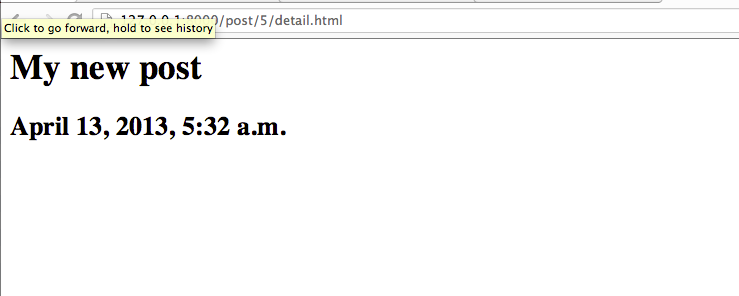
And click “submit” that will redirect you to your new post:

Generic Views
So far, we wrote three simple views in our Django application: an index view that shows a list of Posts; a post_detail view that shows a page about the details of a Post object; and a post_upload view that allows a user to upload a Post onto the database. These views represent a common case of web development: getting data from the database, rendering the data using a template and returning the rendered template as a HTTP response back to the user. Since these kinds of views are so common, Django provides a suite of generic views that help reduce the boilerplate code when writing similar views.
First, we will modify the URL configurations in myblog/urls.py:
from django.conf.urls import patterns, include, url

 # Uncomment the next two lines to enable the admin:
 from django.contrib import admin
 admin.autodiscover()

 from myblog import views

 urlpatterns = patterns('',
     # Uncomment the admin/doc line below to enable admin documentation:
     url(r'^admin/doc/', include('django.contrib.admindocs.urls')),

     # Uncomment the next line to enable the admin:
     url(r'^admin/', include(admin.site.urls)),

     # Use generic views to replace the previous post_index and post_detail viwes
     url(r'^$', views.PostIndexView.as_view(), name='post_index'),
     url(r'^post/(?P<pk>\d+)/detail.html$',
         views.PostDetailView.as_view(),
         name='post_detail'),
     url(r'^post/upload.html', views.post_upload, name='post_upload'),
 )
Notice that post_detail accepts one argument pk which is required by generic.DetailView to fetch the Post object whose primary key is the passed-in argument.
Then, we modify myblog/views.py:
from datetime import datetime, timedelta
from django.core.urlresolvers import reverse
from django.http import HttpResponseRedirect
from django.views import generic

from myblog import models as m


def post_upload(request):
    if request.method == 'GET':
        return render(request, 'post/upload.html', {})
    elif request.method == 'POST':
        post = m.Post.objects.create(content=request.POST['content'],
                                     created_at=datetime.utcnow())
        # No need to call post.save() at this point -- it's already saved.
        return HttpResponseRedirect(reverse('post_detail', kwargs={'post_id': post.id}))


class PostIndexView(generic.ListView):
    template_name = 'index.html'
    context_object_name = 'post_list'
    model = m.Post

    def get_queryset(self):
        ''' Return posts that are created less than two days ago. '''
        two_days_ago = datetime.utcnow() - timedelta(days=2)
        return m.Post.objects.filter(created_at__gt=two_days_ago).all()


class PostDetailView(generic.DetailView):
    template_name = 'post/detail.html'
    model = m.Post
Notice how much more cleaner the code is, compared to the previous version. generic.ListView provides the concept of displaying a list of objects, while generic.DetailView cares about “displaying one specific object”. Every generic view needs to know which model it’s depending on, so the model attribute is required in every generic view subclass.
Because generic.ListView and generic.DetailView accept sensible defaults such as context_object_name to be used in the template and model to be queried against the database, our code becomes shorter and more straightforward instead of caring too much about boilerplate code such as loading and rendering templates. The generic views are a bunch of Python classes that are meant to sub-classed to suit developers’ different needs.
Now you can run the server again to see the exact same output as our previous implementation.
Summary and Suggestions
In this article, we learned how to write a view to handle the POST request, as well as how to use generic views to clean up and improve our views’ code quality. Django is a strong proponent of the Don’t Repeat Yourself (DRY) principle which enforces that every piece of information should have a single, unambiguous and authoritative representation within a system. In Django’s case, it means that there should be only one function, one class or one module in charge of one specific feature. For example, each of the generic views handle only one type of view and encapsulates the functionality essential to that specific type of view, so that the subclasses can re-use the core functionality everywhere. Django’s own implementation and API closely follow the DRY principle to minimize duplication and unnecessary boilerplate code. We should also following the same principle and re-use Django’s generic views whenever we can. When you face a problem where sub-classing a generic view is not enough, I recommend you to read Django’s source code regarding how to implement the generic views and try to write re-usable views instead of mindlessly writing boilerplate code.
