Among the numerous libraries and software suites Python developers have created with and for Python is the Py Suite, a group of tools written in wxPython to assist Python enthusiasts with their programming endeavors.
Also Read: Cloud Computing Notes
Included in this suite is a Python shell worthy of mention called PySlices.
Perhaps this shell’s most distinguishing feature is the capability to execute Python scripts written in notebook-style chunks of code without interfering with other chunks written in the same shell window (in addition to having a “normal” shell mode that can be activated in the Options > Settings menu).
One way this can be extremely useful is when working with scripts that utilize the Tkinter library.
- PyInstaller: Package Python Applications (Windows, Mac and Linux)
- py2exe: Python to exe Introduction
- Overview of Python GUI development (Hello World)
Using PySlices with Tkinter
To illustrate the usefulness of PySlices, let’s examine the case where we were trying out some of the code in the Introduction to Tkinter article. In the standard Python IDLE, if we wanted to see the difference in output when incorporating the select() method for designating default RadioButtons, we’d have to type all of the code to initialize our widgets every time we wanted to change even something as small as selecting button “B” instead of button “A”—this process would be quite tedious and annoying.
If we used PySlices for this task, however, let’s examine how the process would differ:
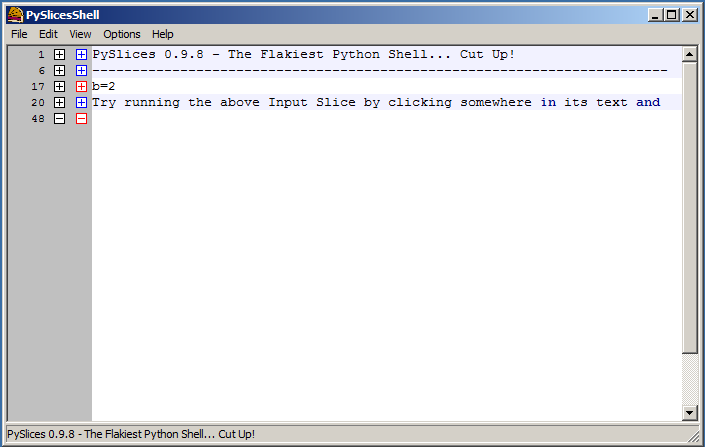
Step 1: Open a PySlices window (and fold all the start-up messages—saves a lot of space, see the line numbers!)
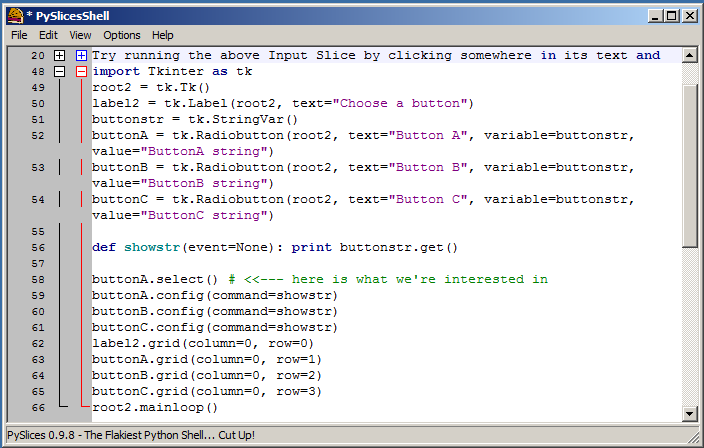
Step 2: Type the code from the example into the next free space
Step 3: Press one of the shortcut key combinations (e.g. Shift-Return) to run it
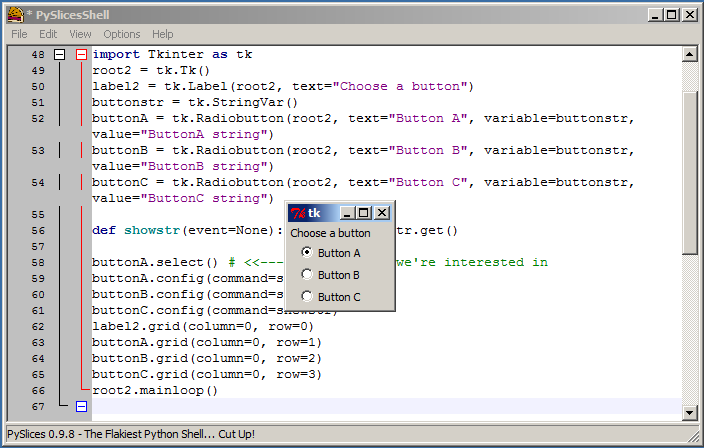
Now we can see the output of our code very easily, and if we want to change the default RadioButton from “A” to “B” as mentioned before, just edit the line of interest and execute the script.
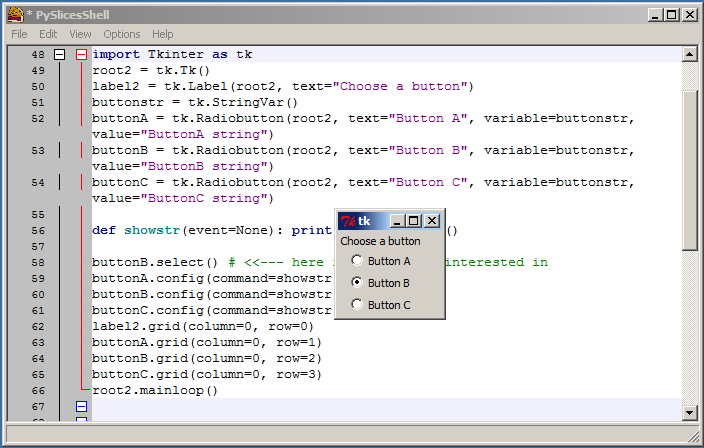
There was no need to restart the shell and/or re-initialize your variables/objects in order to see the difference in tweaking one small part (as you would likely have to do in the standard Python IDLE).
Using PySlices with Regular Expressions
Another situation this shell could come in very handy is while debugging regular expressions. Let’s say we want to work through the first couple of examples in the Introduction to Python Regular Expressions article, without having to re-type our regular expression string and search line every time—as with the Tkinter example, we first type out everything…
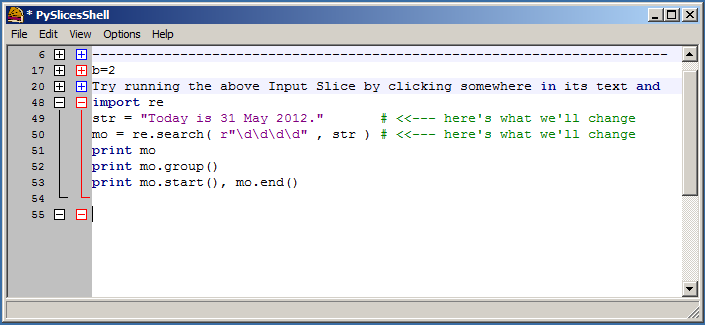
…hit the shortcut to run the script (e.g. Ctrl-Return) and see the output…
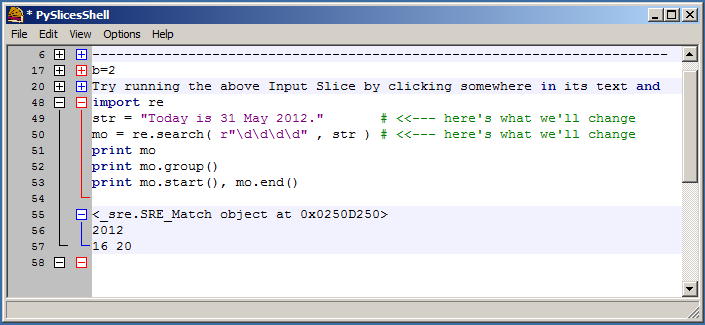
…then change only the important part(s) and re-run the script to see the difference!
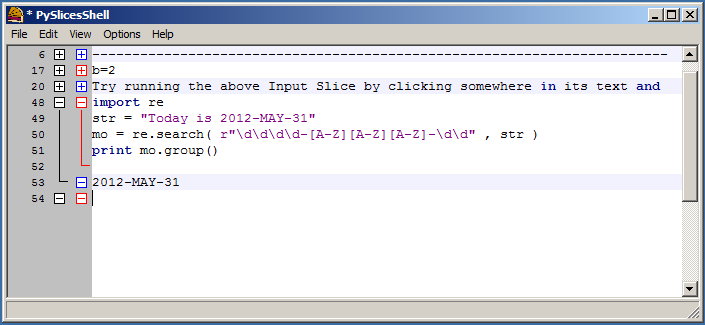
With Python IDLE you can also run scripts repeatedly without having to re-type all of the code, but scripts must be edited and executed from separate windows, and each script has to be saved to disk before being run, regardless of how small it is. With PySlices you can edit and run multiple scripts in one window, and do so without having to save each script to its own file before executing it. The downside to this is that unlike IDLE, PySlices won’t check your script for things like syntax errors before executing it, so it’ll probably yell at you if/when those or any kind of error occurs, but even that cloud has a silver lining—just as you can collapse blocks of code you type, PySlices lets you delete whatever blocks of error-reporting output come from your slices of code!
It’s also easy to save the slices you’ve written in the PySlices window if you want to (they save to .PySlices format—which is all text, in case you ever just want to read through them in a normal text editor), and they are all saved together in the same file instead of actually having to slice them up. Whether for the Tkinter library, regular expressions, or everyday scripting and shell use, PySlices can make your Python scripting experience that much sweeter.
