Overview
While the title of this posts says “Urllib2”, we are going to show some examples where you use urllib, since they are often used together.
This is going to be an introduction post of urllib2, where we are going to focus on Getting URLs, Requests, Posts, User Agents and Error handling.
Please see the official documentation for more information.
Also, this article is written for Python version 2.x
HTTP is based on requests and responses – the client makes requests and servers send responses.
A program on the Internet can work as a client (access resources) or as a server (makes services available).
An URL identifies a resource on the Internet.
What is Urllib2?
urllib2 is a Python module that can be used for fetching URLs.
It defines functions and classes to help with URL actions (basic and digest authentication, redirections, cookies, etc)
The magic starts with importing the urllib2 module.
What is the difference between urllib and urllib2?
While both modules do URL request related stuff, they have different functionality
urllib2 can accept a Request object to set the headers for a URL request, urllib accepts only a URL.
urllib provides the urlencode method which is used for the generation of GET query strings, urllib2 doesn’t have such a function.
Because of that urllib and urllib2 are often used together.
Please see the documentation for more information.
Urllib
Urllib2
What is urlopen?
urllib2 offers a very simple interface, in the form of the urlopen function.
This function is capable of fetching URLs using a variety of different protocols (HTTP, FTP, …)
Just pass the URL to urlopen() to get a “file-like” handle to the remote data.
Additionaly, urllib2 offers an interface for handling common situations – like basic authentication, cookies, proxies and so on.
These are provided by objects called handlers and openers.
Getting URLs
This is the most basic way to use the library.
Below you can see how to make a simple request with urllib2.
Begin by importing the urllib2 module.
Place the response in a variable (response)
The response is now a file-like object.
Read the data from the response into a string (html)
Do something with that string.
Note if there is a space in the URL, you will need to parse it using urlencode.
Let’s see an example of how this works.
import urllib2
response = urllib2.urlopen('https://www.pythonforbeginners.com/')
print response.info()
html = response.read()
# do something
response.close() # best practice to close the file

Note: you can also use an URL starting with "ftp:", "file:", etc.).
The remote server accepts the incoming values and formats a plain text response to send back.
The return value from urlopen() gives access to the headers from the HTTP server through the info() method, and the data for the remote resource via methods like read() and readlines().
Additionally, the file object that is returned by urlopen() is iterable.
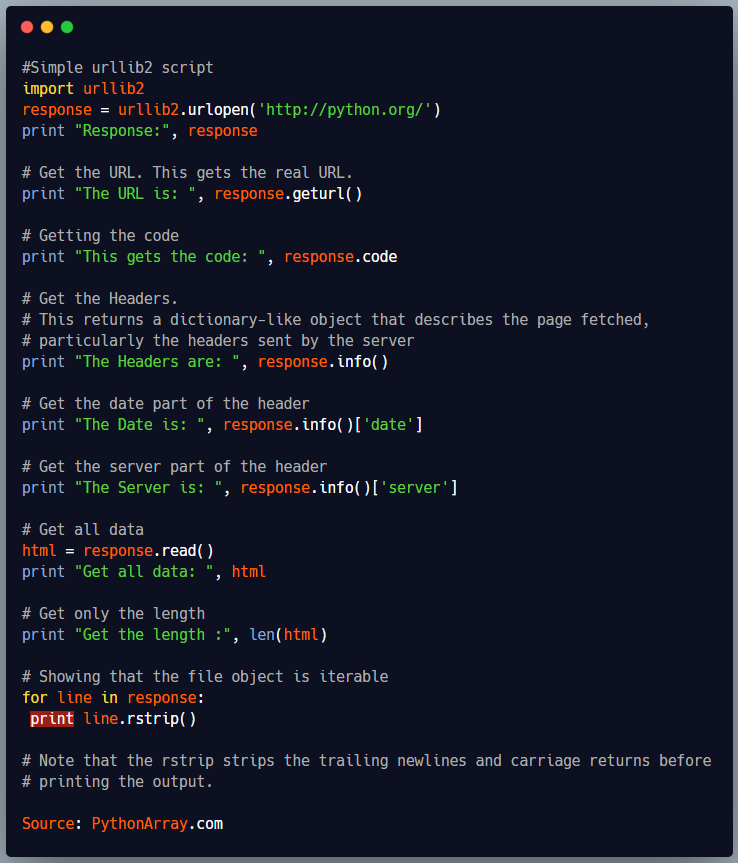
Simple urllib2 script
Let’s show another example of a simple urllib2 script
import urllib2
response = urllib2.urlopen('http://python.org/')
print "Response:", response

# Get the URL. This gets the real URL.
print "The URL is: ", response.geturl()

# Getting the code
print "This gets the code: ", response.code

# Get the Headers.
# This returns a dictionary-like object that describes the page fetched,
# particularly the headers sent by the server
print "The Headers are: ", response.info()

# Get the date part of the header
print "The Date is: ", response.info()['date']

# Get the server part of the header
print "The Server is: ", response.info()['server']

# Get all data
html = response.read()
print "Get all data: ", html

# Get only the length
print "Get the length :", len(html)

# Showing that the file object is iterable
for line in response:
 print line.rstrip()

# Note that the rstrip strips the trailing newlines and carriage returns before
# printing the output.
Download files with Urllib2
This small script will download a file from pythonforbeginners.com website
import urllib2

# file to be written to
file = "downloaded_file.html"

url = "https://www.pythonforbeginners.com/"
response = urllib2.urlopen(url)

#open the file for writing
fh = open(file, "w")

# read from request while writing to file
fh.write(response.read())
fh.close()

# You can also use the with statement:
with open(file, 'w') as f: f.write(response.read())
The difference in this script is that we use ‘wb’ , which means that we open the file binary.
import urllib2

mp3file = urllib2.urlopen("http://www.example.com/songs/mp3.mp3")

output = open('test.mp3','wb')

output.write(mp3file.read())

output.close()
Urllib2 Requests
The Request object represents the HTTP request you are making.
In its simplest form you create a request object that specifies the URL you want to fetch.
Calling urlopen with this Request object returns a response object for the URL requested.
The request function under the urllib2 class accepts both url and parameter.
When you don’t include the data (and only pass the url), the request being made is actually a GET request
When you do include the data, the request being made is a POST request, where the url will be your post url, and the parameter will be http post content.
Let’s take a look at the example below
import urllib2
import urllib

# Specify the url
url = 'https://www.pythonforbeginners.com'

# This packages the request (it doesn't make it)
request = urllib2.Request(url)

# Sends the request and catches the response
response = urllib2.urlopen(request)

# Extracts the response
html = response.read()

# Print it out
print html
You can set the outgoing data on the Request to post it to the server.
Additionally, you can pass data extra information(“metadata”) about the data or
the about request itself, to the server – this information is sent as HTTP
“headers”.
If you want to POST data, you have to first create the data to a dictionary.
Make sure that you understand what the code does.
# Prepare the data
query_args = { 'q':'query string', 'foo':'bar' }

# This urlencodes your data (that's why we need to import urllib at the top)
data = urllib.urlencode(query_args)

# Send HTTP POST request
request = urllib2.Request(url, data)

response = urllib2.urlopen(request)

html = response.read()

# Print the result
print html
User Agents
The way a browser identifies itself is through the User-Agent header.
By default urllib2 identifies itself as Python-urllib/x.y
where x and y are the major and minor version numbers of the Python release.
This could confuse the site, or just plain not work.
With urllib2 you can add your own headers with urllib2.
The reason why you would want to do that is that some websites dislike being browsed by programs.
If you are creating an application that will access other people’s web resources, it is courteous to include real user agent information in your requests, so they can identify the source of the hits more easily.
When you create the Request object you can add your headers to a dictionary, and use the add_header() to set the user agent value before opening the request.
That would look something like this:
# Importing the module
import urllib2

# Define the url
url = 'http://www.google.com/#q=my_search'

# Add your headers
headers = {'User-Agent' : 'Mozilla 5.10'}

# Create the Request.
request = urllib2.Request(url, None, headers)

# Getting the response
response = urllib2.urlopen(request)

# Print the headers
print response.headers
You can also add headers with “add_header()”
syntax: Request.add_header(key, val)
urllib2.Request.add_header
The example below, use the Mozilla 5.10 as a User Agent, and that is also what will show up in the web server log file.
import urllib2

req = urllib2.Request('http://192.168.1.2/')

req.add_header('User-agent', 'Mozilla 5.10')

res = urllib2.urlopen(req)

html = res.read()

print html
This is what will show up in the log file.
“GET / HTTP/1.1? 200 151 “-” “Mozilla 5.10?
urllib.urlparse
The urlparse module provides functions to analyze URL strings.
It defines a standard interface to break Uniform Resource Locator (URL) strings up in several optional parts, called components, known as (scheme, location, path, query and fragment)
Let’s say you have an url:
http://www.python.org:80/index.html
The scheme would be http
The location would be www.python.org:80
The path is index.html
We don’t have any query and fragment
The most common functions are urljoin and urlsplit
import urlparse

url = "http://python.org"

domain = urlparse.urlsplit(url)[1].split(':')[0]

print "The domain name of the url is: ", domain
For more information about urlparse, please see the official documentation.
urllib.urlencode
When you pass information through a URL, you need to make sure it only uses specific allowed characters.
Allowed characters are any alphabetic characters, numerals, and a few special characters that have meaning in the URL string.
The most commonly encoded character is the space character.
You see this character whenever you see a plus-sign (+) in a URL.
This represents the space character.
The plus sign acts as a special character representing a space in a URL
Arguments can be passed to the server by encoding them with and appending them to the URL.
Let’s take a look at the following example.
import urllib
import urllib2

query_args = { 'q':'query string', 'foo':'bar' } # you have to pass in a dictionary

encoded_args = urllib.urlencode(query_args)

print 'Encoded:', encoded_args

url = 'http://python.org/?' + encoded_args

print urllib2.urlopen(url).read()
If I would print this now, I would get an encoded string like this:
q=query+string&foo=bar
Python’s urlencode takes variable/value pairs and creates a properly escaped querystring:
from urllib import urlencode

artist = "Kruder & Dorfmeister"

artist = urlencode({'ArtistSearch':artist})
This sets the variable artist equal to:
Output : ArtistSearch=Kruder+%26+Dorfmeister
Error Handling
This section of error handling is based on the information from Voidspace.org.uk great article:
“Urllib2 – The Missing Manual”
urlopen raises URLError when it cannot handle a response.
HTTPError is the subclass of URLError raised in the specific case of HTTP URLs.
URLError
Often, URLError is raised because there is no network connection, or the specified server doesn’t exist.
In this case, the exception raised will have a ‘reason’ attribute, which is a tuple containing an error code and a text error message.
Example of URLError
req = urllib2.Request('http://www.pretend_server.org')

try:
    urllib2.urlopen(req)

except URLError, e:
    print e.reason

(4, 'getaddrinfo failed')
HTTPError
Every HTTP response from the server contains a numeric “status code”.
Sometimes the status code indicates that the server is unable to fulfill the request.
The default handlers will handle some of these responses for you (for example, if the response is a “redirection” that requests the client fetch the document from a different URL, urllib2 will handle that for you).
For those it can’t handle, urlopen will raise an HTTPError.
Typical errors include ‘404’ (page not found), ‘403’ (request forbidden), and ‘401’ (authentication required).
When an error is raised the server responds by returning an HTTP error code and an error page.
You can use the HTTPError instance as a response on the page returned.
This means that as well as the code attribute, it also has read, geturl, and info, methods.
req = urllib2.Request('http://www.python.org/fish.html')

try:
    urllib2.urlopen(req)

except URLError, e:
    print e.code
    print e.read()
from urllib2 import Request, urlopen, URLError

req = Request(someurl)

try:
    response = urlopen(req)

except URLError, e:

    if hasattr(e, 'reason'):
        print 'We failed to reach a server.'
        print 'Reason: ', e.reason

    elif hasattr(e, 'code'):
        print 'The server could not fulfill the request.'
        print 'Error code: ', e.code
else:
    # everything is fine
Please take a look at the links below to get more understanding of the Urllib2 library.